Warning
OhmPi is a participative project open to all, it requires skills in electronics and to respect the safety rules. OhmPi must be assembled in a professional context and by people competent in electronics. The OhmPi team cannot be held responsible for any material or human damage which would be associated with the use or the assembly of OHMPI. The OhmPi team cannot be held responsible if the equipment does not work after assembly.
Power supply
Two sources of power are available now:
a DC power source (e.g. a 12V battery)
a regulated power supply (DPH5005)
External TX battery
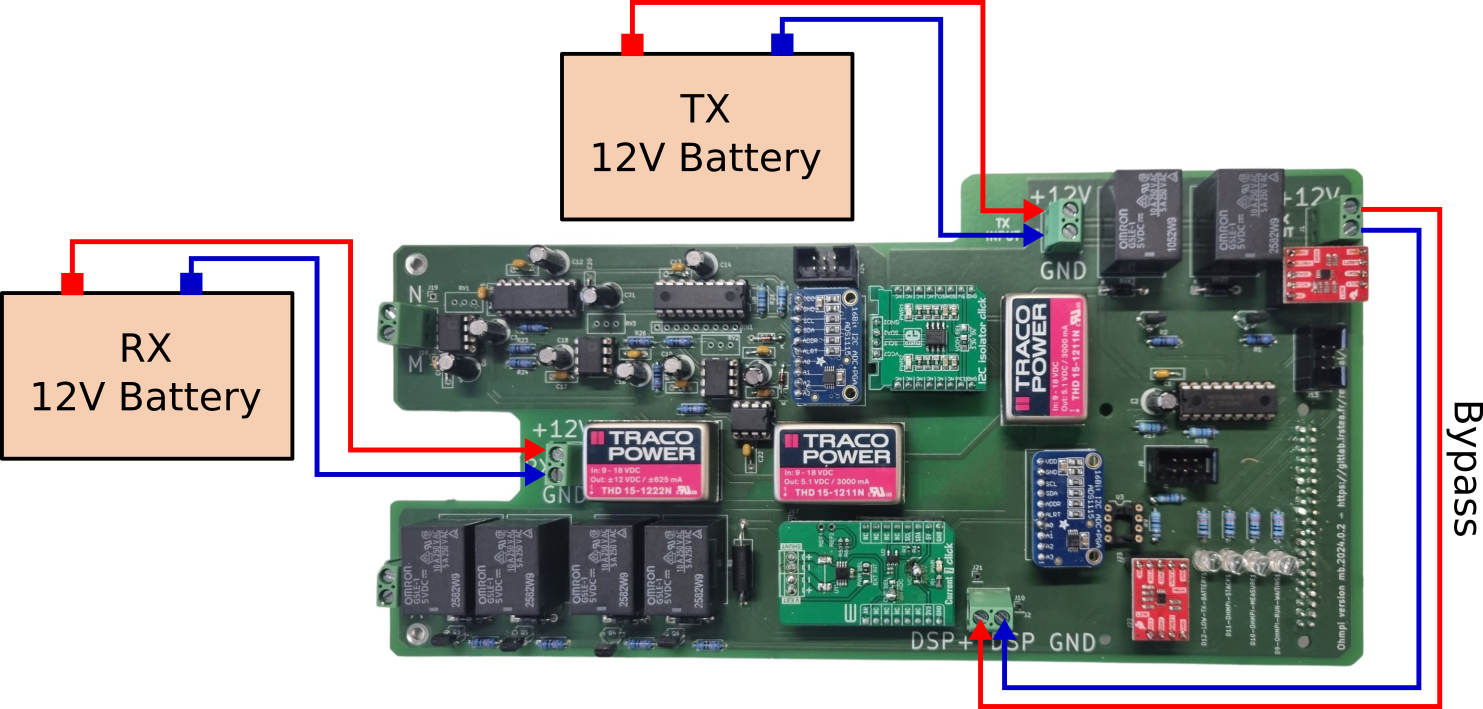
With the measurement board v2024, you can connect the Tx battery following the schematic below. In this simple configuration, a fixed power source, such as a 12V battery is used for the injection. The + and - battery terminals are routed to the TX-batt input + and GND connectors. Then the DPS input and DPS out connectors need to be bypassed.

Wiring of a TX battery used as power module (no DPH5005)
The config file needs to be adapted accordingly with the relevant battery voltage (12 V by default). Since the battery voltage (V_AB) can’t be measured by OhmPi, you should account for a potential ~10% uncertainty on R_AB, which will depend on the battery voltage level.
'pwr': {'model': 'pwr_batt', 'voltage': 12., 'interface_name': 'none'}
Digital power supply (DPH5005)
This digital power supply allows to inject up to 50 V and also to regulate the voltage. It needs to be connected to a 12V battery and can be controlled via USB using modbus by the raspberrypi.

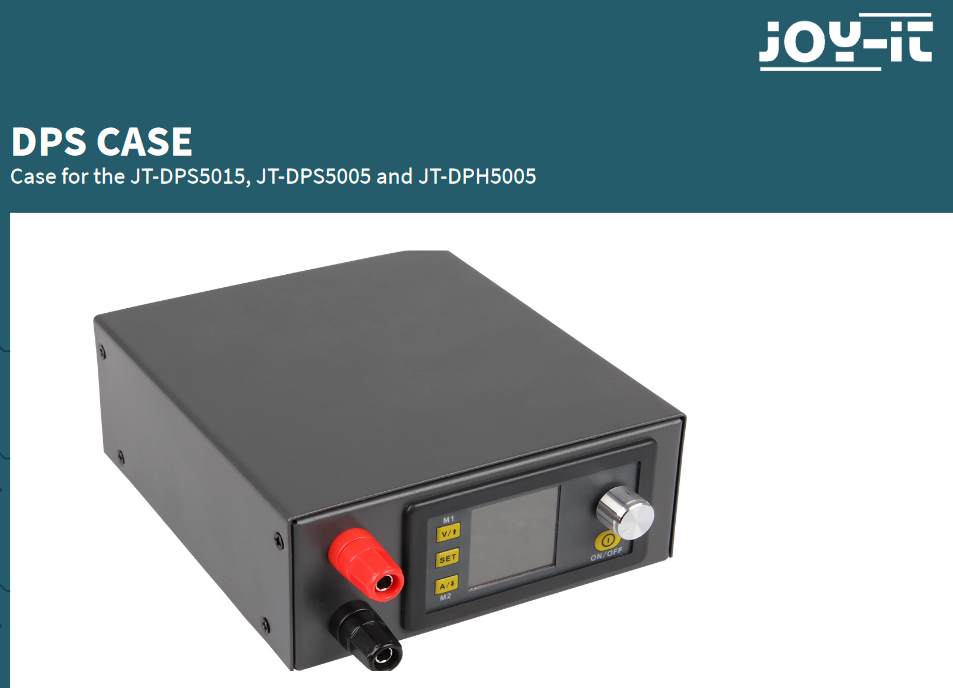
- To assemble DPH5005, please follow the links:
We recommend to purchase a DPH5005 together with a casing and a microUSB adapter.
The default OhmPi config uses a modbus baud rate of 19200, which optimises the communication time with the DPH5005. Since the baud rate is set to 9600 by default on the DPH5005, you will have to manually change it to 19200.
Note
Change the Baud rate from 9600 to 19200, press and maintain V/<up arrow> button while powering on the DPH with the button in the back, you acces to a new menu. Using the V/<up arrow> and A/<down arrow> + pressing and turning the button, change BAUD to 19200. When done, double press ‘SET’ to reboot normally.
Make sure to follow the setup as below (also to be seen in the assembly guide). The DPH5005 needs to be powered from the DPS input connectors, so that the measurement board can switch it on and off as required. The DPS power output is wired to the DPS OUT connectors, as in the figure below. Then a USB to microUSB cable needs to be plugged in to one USB port of the Raspberry Pi.

Wiring of the DPH5005
Then, the config file needs to be adapted accordingly, and the default output voltage can also be specified.
'pwr': {'model': 'pwr_dph5005', 'voltage': 5.}
Warning
Only use DPH5005 with the measurement board v2024
Warning
We sometimes refer to DPS (Digital Power Supply) as a general power supply different from the 12V battery. But this DOES NOT refer to the DPS5005 component (step down DC/DC). The component used in the documentation is the DPH5005 (boost DC/DC converter).
Charging the batteries
It is not recommended to measure with the OhmPi when the Rx or Tx battery is charging (from solar panel or the grid). Indeed, the charger can introduce electronic noise (50/60 Hz) but also perturb the stabilisation of the DPH5005 that will have a harder time to maintain a constant voltage during the injection on-time. We then recommend to disable the charger (using an electronic switch for example) when doing measuremetn with the OhmPi.